5 Free Max4Live Devices

5 Free Creative Max4Live Devices

Looking to expand your Ableton Live toolkit without breaking the bank? Max for Live devices offer a wealth of opportunities to enhance your music production workflow. We've curated a list of five exceptional free Max for Live tools that can inspire fresh ideas, add depth to your tracks, and streamline your creative process.

1. Deviate by Novel Music

Deviate by Novel Music

Get inspired with endless MIDI variations.

Download Deviate

Deviate is a powerful tool that breathes new life into your MIDI clips or live MIDI input. Whether you aim to humanise performances or generate new material from existing clips, Deviate offers a simple yet effective solution. Its key features include:

  • Endless Variations: Create infinite variations on your MIDI clips.
  • Humanise Performances: Add a natural feel to programmed MIDI.
  • Pattern Soft Lock: A 128-step memory buffer for predictable deviations.
  • Parameter Mapping: Map up to four parameters in your Live Set for dynamic modulation.
  • Push Support: Compatible with Push 2 and 3 (Control and Standalone Modes).

Deviate was used to generate midi patterns for extra sampling on our Cascades sample pack. Try using it to switch up existing rhythmic midi patterns to create offset, but related variations.


2. Flechtwerk by TRNR

flechtwerk by trnr
Experience the versatility of a multifaceted synthesizer.

Download Flechtwerk

Flechtwerk is a faithful clone of Mutable Instruments' celebrated Plaits module. This macro-oscillator boasts 16 unique synthesiser models, each controllable with three macro parameters: harmonics, timbre and morph.

Additional features:

  • Integrated LPG Envelope Generator: Utilize Plaits' built-in low-pass gate.
  • Raw Signal Output: Pair with VCA/VCF combos like DmmG/DmmG Pro for a modular experience.
  • Flechtwerk Pro: Upgrade for 8-voice polyphony, an LFO with five shapes, and an integrated step sequencer.


3. Romb by Fors.fm

Romb by Fors

Transform tiny sounds into vast ambient spaces.

Download Romb

Inspired by the expansive soundscapes of late '90s leftfield electronic music, Romb excels at sending even the smallest sounds into an ambient void. It's perfect for producers looking to add lush, ethereal textures to their tracks. Key attributes include:

  • Transcendent Reverb: Free of transients and definition, creating an expansive feel.
  • Synthesiser Compatibility: Pairs well with any synth to enhance atmospheric depth.


4. SnAkE Sequencer by Maximedanglesdevice

SnAkE Sequencer by Maximedanglesdevice
Unlock complex sequencing possibilities.

Download SnAkE Sequencer

The SnAkE Sequencer brings the ingenuity of modular sequencing into Ableton Live. Inspired by Make Noise's renowned "René" sequencer, this MIDI effect allows you to explore intricate rhythmic patterns and melodic sequences with features like:

  • Intuitive Interface: Easily navigate and manipulate sequences.
  • Modular Inspiration: Emulate the flexibility of hardware sequencers within your DAW.
  • Creative Exploration: Ideal for experimental music styles and complex arrangements.


5. Retur by Fors.fm

Retur by Fors.fm
Add gritty, vintage delay to your tracks.

Download Retur

Another entry from Fors, Retur captures the essence of classic analog delay pedals, delivering intensely colourful and grungy echoes. Its features include:

  • Screeching Feedback: Push the boundaries with escalating feedback loops.
  • Character Focused: Emphasises the unique artefacts of analog delay.
  • Vintage Vibe: Perfect for adding a nostalgic touch to modern productions.


Expanding your Ableton Live setup with these free Max for Live devices can significantly enhance your music production journey. Whether you're seeking new creative avenues, looking to add depth and character to your tracks, or aiming to streamline your workflow, these tools offer valuable resources at no cost. Happy exploring!


Modulation in Synthesis Unlocking Creative Sound Design

Modulation in Synthesis: Unlocking Creative Sound Design

In the world of sound synthesis, modulation is the magic ingredient that breathes life into static tones. Without it, synthesised sounds can feel flat and uninspiring, lacking the dynamic qualities that make music engaging. Modulation introduces movement, complexity, and expressiveness by altering sound parameters over time. This transformative process is essential for creating evolving textures, rhythmic patterns, and emotionally resonant performances. In this short article, we'll explore the importance of modulation in synthesis, delve into its practical uses, and uncover creative applications within a synthesiser to enhance your sound design journey.

Understanding Modulation

At its core, modulation involves using one signal (the modulator) to control another signal (the carrier). In the context of synthesis, this means employing various modulation sources to alter aspects of your sound over time, such as pitch, amplitude, or timbre. Common modulation sources include Low-Frequency Oscillators (LFOs), envelopes, key tracking, velocity sensitivity, and performance controls like the modulation wheel, aftertouch and MPE.

Modulation is pivotal because it adds movement and life to sounds, preventing them from remaining static and monotonous. It enhances expressiveness, allowing for more emotional and dynamic performances that respond to player input. By expanding movement possibilities, modulation unlocks a wider range of sounds and textures unattainable with fixed parameters. It's essential for crafting complex sound designs, from evolving pads to intricate rhythmic sequences.

Modulation Sources and Uses

arturia pigments modulation routing
Arturia Pigments's modulation routing.

Low-Frequency Oscillators (LFOs)
LFOs operate at frequencies below the audible range (typically below 20 Hz) and are not heard directly. Instead, they modulate parameters like pitch, amplitude, and filter cutoff to introduce movement. For example, modulating pitch with an LFO can create a vibrato effect, adding a subtle, periodic variation that brings a sustained note to life. Similarly, modulating amplitude produces tremolo, causing the volume to fluctuate and adding dynamic interest. Using an LFO to modulate filter cutoff can make the timbre of a sound evolve over time, enhancing its expressiveness.

Envelopes
Envelopes are control signals that change over time, typically triggered when a note is played. They shape the sound by controlling parameters such as amplitude, filter cutoff, or pitch throughout the duration of a note. The classic ADSR envelope (Attack, Decay, Sustain, Release) defines how quickly a sound reaches its peak (attack), how it decreases to the sustain level (decay), how long it stays at the sustain level, and how it fades away after the key is released (release).

By adjusting these stages, you can mimic the dynamic characteristics of various instruments. For instance, a sharp attack and quick decay can emulate the percussive quality of a piano, while a slow attack and long release can replicate the swelling sound of a string ensemble. Envelopes are vital for adding expressiveness and realism to synthesised sounds.

Key Tracking (Keyboard Follow)
Key tracking modulates parameters based on which key is pressed, allowing for natural variations across the keyboard. Applying key tracking to the filter cutoff means that higher notes can sound brighter while lower notes sound warmer, mirroring the behaviour of many acoustic instruments. This modulation ensures that the sound remains balanced and expressive throughout its range, adding to the musicality of your performance.

Velocity and Aftertouch
Velocity sensitivity responds to how hard you strike the keys, while aftertouch responds to the pressure applied after the initial key press. These modulation sources allow for dynamic expression, enabling you to control parameters like volume, brightness, or vibrato intensity based on your playing technique. Mapping velocity to multiple parameters can result in nuanced performances that capture the subtle expressions of acoustic instruments, making your synthesised sounds more engaging and emotionally resonant.

Modulation Wheel and Other Controllers
Physical controls like the modulation wheel, pitch bend, and expression pedals offer real-time modulation capabilities. Assigning these controllers to key parameters such as vibrato depth, filter cutoff, or effects intensity allows you to manipulate sounds on the fly, adding a human, performative touch.

Creative Applications of Modulation Within a Synthesiser

U-he Diva's modulation options.

So, how to utilise these modulation sources in a synthesiser? Most synthesisers have modulation capabilities, but not all are equally in depth. Whether you’re using a physical synth or a VST, here’s a (non exhaustive) list of some practical creative uses.

Evolving Pads
Evolving pads are staple sounds in ambient, cinematic, and electronic music genres. By using slow LFOs to modulate parameters like filter cutoff, oscillator mix, and effects settings, you can create pads that change subtly over time. Modulating the wavetable position in a wavetable synthesiser, for example, can morph the sound between different textures, adding more depth.

Rhythmic Sequences
Modulation is key to creating rhythmic sequences that add movement to your tracks. Syncing LFOs or step sequencers to your project's tempo allows you to modulate parameters rhythmically. For instance, modulating filter cutoff or amplitude with a tempo-synced LFO can produce rhythmic gating effects.

Complex Leads and Basses
By combining multiple modulation sources, you can design leads and basses that are both expressive and dynamic. Modulating pitch with an envelope can create quick glide effects at the start of a note, adding character to lead sounds. Similarly, applying envelope modulation to distortion parameters can make bass sounds more aggressive during the attack phase. Layering modulation on filters, oscillators, and effects allows you to craft unique bespoke sounds that stand out.

Experimenting with FM and AM Synthesis
Frequency Modulation (FM) and Amplitude Modulation (AM) synthesis involve using one oscillator to modulate the frequency or amplitude of another, resulting in rich, complex timbres with unique harmonic content. FM synthesis is famous for creating bell-like tones and metallic textures, while AM synthesis can produce interesting rhythmic and tonal variations.

Textural Soundscapes
For experimental music and sound design, modulation can introduce unpredictability and evolution. Applying random or noise modulation sources to parameters like pitch, filter cutoff, or effects creates sounds that evolve in unforeseen ways. Modulating pan position with a random LFO, for example, can make sounds move unpredictably within the stereo field, enhancing immersion.

Utilising Audio-Rate Modulation
Audio-rate modulation occurs when modulation sources operate at audible frequencies (above 20 Hz). This technique can add new harmonics and timbres to your sounds, leading to complex and gritty textures. Modulating filter cutoff with an audio-rate oscillator, for instance, can produce growling effects, especially effective in aggressive sounds for genres like dubstep and drum and bass.

Spatial Modulation
Adding movement in the stereo field can make your sounds more engaging and three-dimensional. Modulating reverb parameters or using LFOs to automate panning creates sounds that occupy and move through space. Automating the size or decay time of a reverb effect can make a sound feel like it's moving closer or farther away. These spatial modulation techniques enhance the depth and realism of your patch.

Quick Modulation Tips

  • Start Simple: Begin with basic modulation assignments to understand their impact before adding complexity.
  • Listen Critically: Use your ears to assess how modulation affects the sound, ensuring it enhances rather than detracts.
  • Use Visual Feedback: Many synthesisers offer visual representations of modulation paths, helping you grasp how changes influence the sound.
  • Experiment with Depth and Rate: Small adjustments in modulation depth and rate can have significant effects; don't hesitate to tweak parameters.
  • Avoid Over-Modulation: Too much modulation can make sounds chaotic; aim for balance to maintain musicality.
  • Save Your Patches: When you stumble upon interesting modulation settings, save them for future use to build a library of unique sounds.

Just the Beginning

Xfer Serum's extensive modulation matrix

Modulation is a powerful tool that expands the expressive capabilities of any synthesiser. By understanding and harnessing various modulation sources and techniques, you can infuse your sounds with movement, emotion, and uniqueness. Modulation doesn’t just apply to synthesis though; try applying these same concepts to other aspects of your process. Modulate parameters of your DAW, or external gear via midi or CV. It's an invitation to explore the depths of your equipment, experiment without limitations, and express yourself more fully through music.

Happy modulating!


Understanding Different Equalisers and Their Unique Strengths

Understanding Different Equalisers and Their Unique Strengths

Equalisation (EQ) is one of the most powerful tools in music production, allowing us to shape and balance frequencies across an entire mix. Whether adding warmth to a synth, removing muddiness from vocals, or adding presence to a guitar, EQ is essential for bringing a track to life, and placing your sounds in the mix. While stock DAW EQs are fantastic starting points, certain EQs offer unique colour and character that can make all the difference. Here’s a look at a few different EQs and their individual strengths, including some of our personal favourites.


Ableton Live EQ8
Ableton Live's EQ8

The Basics of EQ: Stock DAW EQs

Every Digital Audio Workstation (DAW) includes a built-in EQ, which is often more than capable for most basic mixing needs. Typically, stock EQs are digital and transparent – They don’t add extra colouration, which makes them ideal for tasks like cutting harsh frequencies or boosting clarity in a mix. Stock EQs are (usually) great for precise adjustments, especially if you want to keep your CPU load low in a larger mix.

While stock EQs are solid all-rounders, exploring more characterful EQs can reveal new layers of sound, adding subtle depth or distinct colour.


Unique EQs and Their Use Cases

Different EQs offer different sonic characteristics, often thanks to their analogue design or emulation. Here are a few specialised EQs we find invaluable and where they shine in a mix.

Fabfilter Pro Q3
Fabfilter Pro Q3

FabFilter Pro-Q3

The Pro-Q3 is a modern, digital EQ known for its precision and detailed visual interface. It features dynamic EQ, mid/side processing, and fully customisable curves, making it Ideal for surgical work and resonance control. Pro-Q3 is our go to EQ for everything from precise dynamic adjustments, to automated filter curves. All without adding any colouration.

SSL G and E-Series EQs

SSL EQs have a distinct sound often described as “tight” and “gluey.” The G-Series EQ, in particular, is known for its smooth high-end and tight low-end, while the E-Series offers a slightly more aggressive bite. SSL EQs are a staple for mixing drums and vocals. The G-Series is great for smooth high-end boosts, adding clarity without harshness, while the E-Series can help shape punchy, dynamic drums or add a bit of grit to vocals. SSL EQs are great for creating cohesion across the mix as a whole.

API 550A/550B EQ

The API EQs (550A and 550B), are known for their punchy, aggressive sound. They feature fixed frequency bands and a proportional Q, which means the bandwidth narrows as you boost more—great for adding energy to a mix. Use the API EQs when you want to add presence to guitars, drums, or vocals. Their aggressive midrange character can help certain elements stand out in the mix.

UAD Pultec EQs

The Pultec EQ emulation is known for its warm, musical character, derived from the original Pultec passive EQ hardware. Unlike digital EQs, it imparts a natural, rich tone that enhances rather than adjusts. Pultec EQs are perfect for broad tonal shaping, especially in the low-end. This EQ can add punch to bass or kick drums without muddiness and adds a beautiful shine to vocals and synths. It’s not about precision but about adding that vintage warmth and depth. Our go to for external synths.

UAD Pultec MEQ5 and EQP1A

Digital vs. Analogue-Style EQs

The difference between digital and analogue-style EQs often comes down to colour and character. Digital EQs like FabFilter Pro-Q3 are transparent, offering clean and precise adjustments.

Analogue EQs like the Pultec, API, and SSL bring added warmth and harmonic richness, making them well-suited for creative sound shaping and tonal enhancement. To simplify, here's a quick rundown:

  • Corrective Tasks: Digital EQs (stock or FabFilter) are perfect for removing unwanted frequencies without altering the sound.
  • Character and Depth: Analogue-style EQs add musicality, ideal for enhancing the low end, adding midrange punch, or brightening vocals with a smooth high end.


So, which to choose?

There’s no right or wrong choice here. Music is a creative endeavour afterall; but typically EQ’s are chosen based on the job.

If you’re mixing and want clean, fine adjustments - digital is the way to go. It won’t colour the sound much (if at all), and it’ll allow you to dynamically place elements of your mix.

If you’re recording an instrument or vocals, colourful analogue EQ’s are excellent to add character. Subtlety is key, but when used correctly, can add so much to an existing sound. 

One of our favourite hardware synthesisers here at Form Audioworks is the excellent Novation Peak, and when paired with various analogue style EQs, it sounds phenomenal. An integral part of our sound design; we typically use the Pultec EQ’s to add colour on the way in, and use Pro Q3 to adjust the sound surgically later in the chain. This way, we get the benefits of both worlds.

Waves API 550A and 500B

Finding Your EQ Sound

While stock DAW EQs provide a great foundation, exploring various EQs can open new creative pathways in your mix. The right EQ choice depends on your goals—whether it’s surgical precision or adding subtle warmth. Each EQ brings something unique, so don’t hesitate to experiment with different types and discover what resonates with your style. EQ is both art and science, and finding your favourites can be transformative for your sound and your mixes overall.


Why Texture and Ambience Matter in Music Production

In music production, the elements of texture and ambience are often the unsung heroes that turn a basic track into a rich, immersive experience. While the core melody and rhythm might be the foundation of your music; it’s the subtle layers of sound—those background pads, ambient noises, and spatial effects—that add depth, emotion, and complexity to your mix. Whether you're producing electronic, cinematic, or lo-fi music, texture and ambience help shape the mood of your track, making it feel more alive and dynamic. These elements create a sense of space, making your mix sound bigger, fuller, and more polished. Without them, music can feel flat or one-dimensional, lacking the depth needed to keep listeners engaged.

Texture and ambience play a key role in attaching your music to a specific place or feeling, giving listeners a deeper connection with the track. The right sound can evoke memories of a rainy city street, the calm of a quiet field, or the intensity of a crowded club. By embedding these sonic cues into your music, you link your track to real-world emotions and environments, making the listening experience more relatable and impactful for the listener.

In this post, we’ll explore why texture and ambience are essential for professional-quality music production, and how you can use them to transform your mixes. By the end, you’ll be equipped with practical tips and techniques to elevate your sound, using texture and ambience to add depth to tracks that stands out.

What is Texture in Music Production?

In music production, usually texture refers to the layers of sound that interact within a track, adding richness and depth. Especially in genres like electronica, downtempo, and lo-fi, texture plays a crucial role in setting the mood and guiding the listener through an audio journey. These genres thrive on atmospheric elements that breathe life into minimal compositions, where every subtle sound counts.

In electronica, texture often comes from synth pads, evolving drones, and ambient layers that provide a backdrop to the rhythmic and melodic elements. Think of those lush, floating synths that fill in the spaces between beats or the light distortion that adds warmth to an otherwise digital sound. These elements create a sonic environment that feels immersive and expansive, giving the listener a sense of space beyond the primary melody and beat.

Similarly, downtempo and lo-fi music is all about creating a laid-back, chilled atmosphere. Texture here can come from soft background noises—like vinyl crackle, tape hiss, distant conversations, or environmental field recordings—that give the track an organic, grounded feel. These subtle layers create warmth and nostalgia, making the listener feel as if they’re being transported to another time or place. The art lies in layering sounds thoughtfully—whether it’s a soft, airy synth or a gentle echo of a distant sound—so that the textures interact without overshadowing the main musical elements.

For a rich collection of sounds perfect for crafting these kinds of atmospheres, check out our Aether Downtempo Electronica Pack, which offers everything from lush pads to ambient textures designed specifically for creating immersive downtempo tracks.

Why Ambience is Essential for Creating Depth

Ambience plays a critical role in shaping the overall vibe of a track. It isn’t just about adding reverb or delay—it’s about creating a sense of space that makes the listener feel immersed in the music. Ambience brings depth, dimension, and a spatial quality that transforms a flat mix into a rich, immersive experience.

One of the main tools for creating ambience is reverb, which mimics how sound behaves in different environments. Whether it’s the cavernous echo of a distant hall or the tight resonance of a small room, reverb can place your sounds in a realistic or abstract setting. It adds a layer of complexity and richness, allowing listeners to feel as though they are enveloped by the sound. Valhalla DSP make some of our favourite reverbs, and they're very affordable.

Another crucial element of ambience is delay. By echoing sounds at different intervals, delay can add rhythmic complexity or create a sense of motion within a track. A well-placed delay can transform a simple melody into a hypnotic loop that feels both spacious and intricate, enhancing the overall listening experience.

But ambience isn’t only about effects like reverb and delay—it also comes from ambient samples and field recordings. Adding environmental sounds like rainfall, street noise, or distant chatter can instantly give your track a sense of place. These sounds add layers that are felt more than heard, contributing to the emotional landscape of the music.

Ambience ties everything together. Without it, even the most creative melodies and rhythms can feel disconnected or incomplete. It’s the glue that binds the textures, creating a unified soundscape that listeners can get lost in. Knowing how to use ambience effectively is key to making your music stand out, regardless of the style.

How to Add Texture and Ambience to Your Mix

Incorporating texture and ambience into your mix doesn’t have to be complicated. It’s about layering sounds thoughtfully and using effects to create depth and space without overcrowding your track. Here are some practical tips to elevate your productions with texture and ambience:

Layering Pads and Drones
One of the simplest ways to add texture is by layering synth pads or drones under your main elements. Pads can create an evolving background that fills the empty space between beats, while drones can add an atmospheric undertone that keeps the listener engaged. Experiment with different pads and drones from our Cascades Sample Pack to find the right mood for your track.

Using Reverb and Delay for Space
Reverb and delay are essential tools for crafting ambience and giving sounds room to breathe. Apply reverb to instruments like synths, vocals, or percussion to place them in a larger space. Long, lush reverb can make sounds feel expansive and dreamy, while more subtle reverb can add warmth and intimacy.
Delay, on the other hand, helps create rhythmic movement. A well-timed delay can add complexity to simple elements by creating echoes that interact with the main rhythm. Short delays can introduce a soft, bouncing groove, while longer delay times can create hypnotic repetitions that expand across the stereo field.

Incorporating Field Recordings and Background Noise
Field recordings and environmental sounds can be powerful tools for adding a sense of place or realism to your tracks. A quiet background hum, the sound of wind blowing, or even distant city noise can add texture and ambience that feel organic and immersive. Subtle sounds like water droplets or birdsong can enhance the listener's experience, making them feel connected to a specific environment.

Automating Effects for Evolving Textures
To keep your track dynamic, consider automating your effects—especially reverb, delay, and modulation. By gradually increasing or decreasing these effects over time, you can create evolving textures that maintain listener interest. For example, increasing reverb on a sound during a breakdown can create a sense of expansion, while gradually introducing delay on percussion can build anticipation before a significant moment. Automating subtle changes in effects can give a groove a flowing, organic feel, while modulation effects like phasers or flangers on pads and drones can create constantly shifting textures that maintain interest without overwhelming the mix.

Incorporating Granular Effects
Granular synthesis is another powerful technique for adding texture and depth. By breaking sounds into tiny grains and rearranging them, you can create rich, evolving textures that transform the original material. Granular effects can produce everything from shimmering soundscapes to gritty, glitchy elements, offering a unique way to manipulate your audio. Try applying granular effects to samples, recordings, or even synths to create unexpected textures that enhance your mix.

Common Mistakes and How to Avoid Them

When working with texture and ambience, producers often encounter common pitfalls that can compromise the quality of their mixes. One frequent mistake is the overuse of reverb. While reverb can create a sense of space, too much can lead to a muddy mix, obscuring the clarity of the main elements. To avoid this, use reverb cautiously—consider applying it only to specific sounds, like vocals or pads, and use automation to adjust the reverb level during different sections of the track.

Another common issue is layering too many sounds without considering the overall balance. Cluttered layers can lead to a chaotic mix that lacks focus. To maintain clarity, start with a few key elements and gradually add textures. Make sure each layer has its own space in the frequency spectrum—use EQ to carve out room for each sound, ensuring that they complement rather than compete with each other. Additionally, regularly solo different layers while mixing to ensure each one contributes meaningfully to the overall sound. Ask yourself whether each layer truly needs to be there or if it’s simply adding to a pile of sounds that could clutter your mix.

By being mindful of these common mistakes and employing thoughtful layering and effects techniques, you can achieve a well-balanced mix that showcases the beauty of texture and ambience.

---

Incorporating texture and ambience is essential for creating a professional mix that resonates with listeners. These elements enrich your music, adding depth and emotional impact that draws the audience in. By experimenting with the techniques discussed—such as layering sounds, using reverb and delay thoughtfully, and incorporating field recordings—you can enhance the quality of your productions.

Don’t forget to explore our sample packs, which are filled with ready-to-use textures and ambient sounds designed to elevate your music. Embrace the creative process and let your music come to life through the power of texture and ambience!


Form Audioworks x Loopmasters

We're delighted to announce a new chapter for Form Audioworks through our partnership with Loopmasters and Loopcloud. This collaboration opens up our innovative sound packs to a broader range of music creators and enthusiasts. All 3 of our current sample packs ("Cycles Melodic Techno, "Aether Downtempo Electronica" and "Lofi Fusion") are now featured on these renowned platforms, offering a spectrum of sounds to inspire and elevate music projects.

In addition to our current offerings, we're on the cusp of releasing a new pack next month. This upcoming release embodies our philosophy of exploring new soundscapes and creative sound design, and we can't wait to show you soon.

Our future releases will continue this trajectory of innovation and quality, all available on Loopmasters and Loopcloud. We're excited to see the new creative heights our sounds will help you achieve and we're grateful for your continued support as we embark on this exciting journey together!


5 free online tools to make beats

In this article, you can find 5 free online tools to make beats and music with. The best thing about them is that they work without any registration or login details, so whenever you feel like jamming out you can simply hit the link and start making. These websites are a great way to get hooked on finger drumming and if you are new to music making as a whole, they serve as an amazing and fun experience to get into more advanced music production.


Patatap

https://patatap.com

patatap

Patatap is a collaborative audio visual project by Japan based music duo Lullatones and Jono Brandel. Together they created a wonderful online music maker that’s not only great sounding but also very nice to look at. Sounds and samples are spread across the entire keyboard from A-Z. By pressing the spacebar you can load a new sound collection that also comes with a new set of colorful visuals. Unfortunately, it does not feature any loop or tempo functions but it’s an amazingly fun tool to practice your finger drumming skills.


HTML5 Drum Machine

https://html5drummachine.com/virtual-drum-machine/

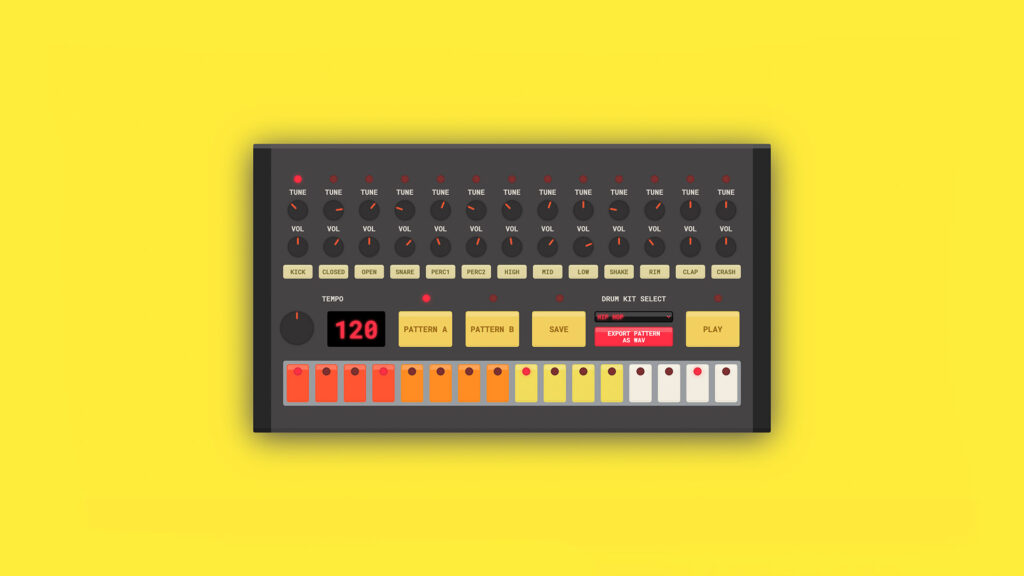
HTML5 Drum Machine‘HTML5 Drum Machine’ is a free online instrument inspired by the iconic Roland TR-808 rhythm composer. 5 different drum kits in the genres of hip hop, electro, house, techno and acoustic are available with integrated tempo, volume and tune controls - allowing you to make analogue type beats in a very fun and intuitive way. What’s super handy is that you can switch to a new drum kit but keep your programmed drum pattern going. Additionally if you want to switch to your DAW (Digital Audio Workstation) you can simply export your drum loop as a wav file and continue working in Ableton, FL Studio, Logic and co. We really love how analogue sounding the samples are and spent a decent amount jamming along our newly created rhythms.


Typedrummer

http://typedrummer.com/

typedrummerTypedrummer is one of the most fun online music websites out there. There isn’t too much to explain or say other than to try out different words and phrases to see how they sound. You can switch between two sound kits - the default one is drum focused and the second one introduces more melodic elements for you to play around with.

Words for you to try out:
type, cabbage, endurance, cosmos, okay wow


Sampulator

http://sampulator.com/

sampulatorSampulator is a clean looking online sequencer that’s perfect for making quick beats. 45 samples in total are playable across your entire keyboard with integrated metronome and tempo control. Hit shift to record your jam and don’t worry about the exact placement, you can easily edit your hits by dragging them to the left or the right in the timeline below.


Chrome Music Lab

https://musiclab.chromeexperiments.com/Experiments

Chrome Music LabChrome Music Lab is a playful website that inspires people and especially kids to learn and make music in a more accessible way with hands-on experiments. The project explores music and its connections to science, math and art. Not only are the simplified technical tools on the page wholesome but also very educational. After exploring all the individual tools like the Spectrogram, Harmonics or the Oscillator you can visit the song maker to put your newly gained knowledge to the test.

When you are still lusting for more, don't worry we got you covered! Our debut sample pack 'Lofi Fusion' contains lots of full drum loops that you can easily drag and drop into your projects to get quick ideas going.


Useful Ableton Shortcuts

Ableton Live is a wonderful DAW. From its great sounding built-in instruments and effects, to excellent hardware integration, there’s a reason why it’s one of the most popular DAWs in the world.

Intuitive workflow is at the heart of Ableton Live, but it’s even better with handy shortcuts. We’re sure you already know some of these, but it’s always good to recap. Plus there’s a handy cheat sheet at the bottom of the page that you can save!

Read on for 17 useful Ableton Live shortcuts.


cmd (ctrl) + i – Insert Silence

This one is a great time saver. Selecting a bunch of clips in arranger view and moving them to create space can be a hassle. Just put your cursor where you want this insert a blank space and hit the shortcut.


cmd (ctrl) + Shift + D – Duplicate Time

Similar to Insert Silence, but instead of creating an empty area, you can duplicate a section of your arrangement into a new empty area and ‘push’ the existing arrangement out of the way, rather than overwriting it.


cmd (ctrl) + Shift + V – Paste Time

Copied a clip and want to insert it before something else without manually moving your arrangement? No worries, just select where you want to paste and hit the shortcut to paste and automatically make space.


cmd (ctrl) + SHIFT + Delete – Delete Time

Hit this shortcut to delete extra space in your arrangement.


cmd (ctrl) + L – Loop selection

Highlight a section in your arrangement and hit the shortcut to loop only that specific region.


cmd (ctrl) + T – Insert Audio Track

Inserts a new audio track (with your default settings).


cmd (ctrl) + Shift + T – Insert Midi Track

Same as above, but a MIDI track instead.


cmd (ctrl) + Shift + M – Insert Midi Clip

Select an area of a track in your arrangement and hit the shortcut to create a blank MIDI clip.


cmd (ctrl) + Shift + R – Render Selection

Select an area of your track and run the shortcut to render that section only. Great for creating stems or bouncing to audio.


cmd (ctrl) + J – Consolidate

Warped an audio track or cut one up and want to make those changes permanent for dropping in a sampler? Easy, just select the audio clip(s) and hit the shortcut to consolidate to a new audio file. Take note, this overwrites what is already there.


cmd (ctrl) + E – Split Clip

Works for both audio and MIDI. Just place your marker where you want to split and hit the shortcut to split the clip.


cmd (ctrl) + Shift + U – Quantize

When inside a MIDI clip, hit this shortcut to bring up the quantize menu.


cmd (ctrl) + Option (alt) + F – Create Crossfade

Use this to create a crossfade between two audio clips. Just select the area where you want to apply the crossfade and hit the shortcut.


R – Reverse selected audio clip

Reverses the audio clip.


H – Optimize Height

Optimizes the height of the project.


W – Optimize Width

Optimizes the width of the project.


Z – Zoom

Zoom to Arrangement Time Selection.

For a full list of Ableton Live shortcuts, head over to the Ableton website and check out the manual.


Ableton Live Shortcut Cheat Sheet

Here's a handy jpg to save for quick use! Just right click the image and hit save as.